
Chocolate Sugar Cookies with Chocolate Royal Icing and Spooky Halloween Details
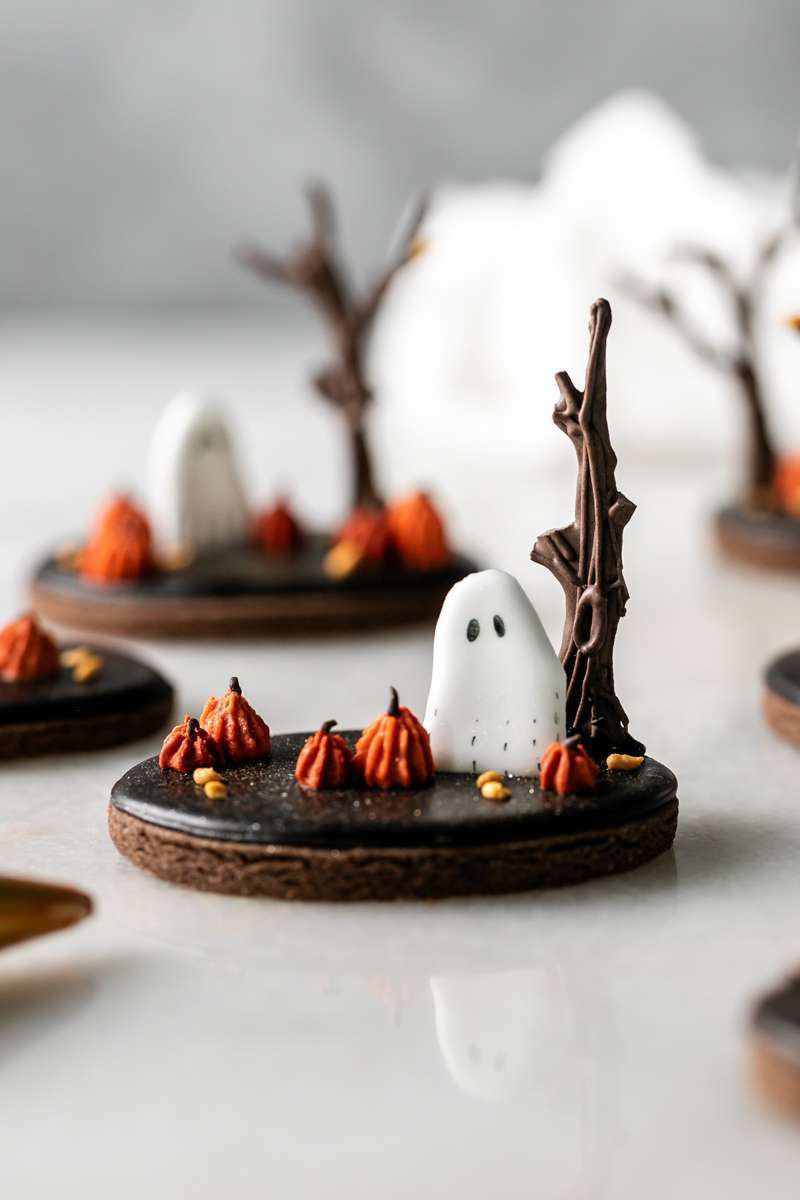
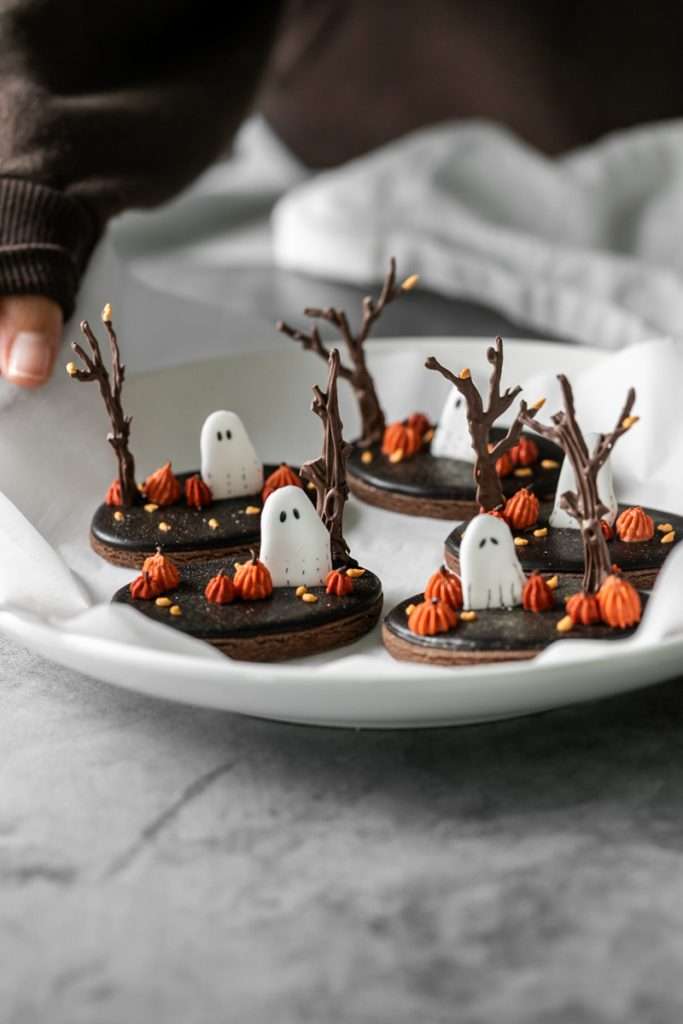
New chocolate sugar cookies, with chocolate royal icing and decorated Halloween details. The perfect cutout cookie recipe for chocolate lovers! A close relative to our classic sugar cookie recipe, infused with Hershey’s unsweetened cocoa and a few secret ingredients to enhance the chocolate flavor! Easy, homemade and a must make for cozy season, these double chocolate cookies, are delicious as is and even sweeter decorated with spooky and festive royal icing transfers, and piped details for upcoming Halloween!
This post contains affiliate links which means I may earn a commission if you choose to make a purchase using the highlighted links included in the post.
Chocolate Sugar Cookies with Chocolate Royal Icing and Spooky Halloween Details
Rich chocolatey cut out sugar cookies, decorated with chocolate royal icing and spooky 3D Halloween themed icing transfers. Perfect for cozy baking season and upcoming Halloween. 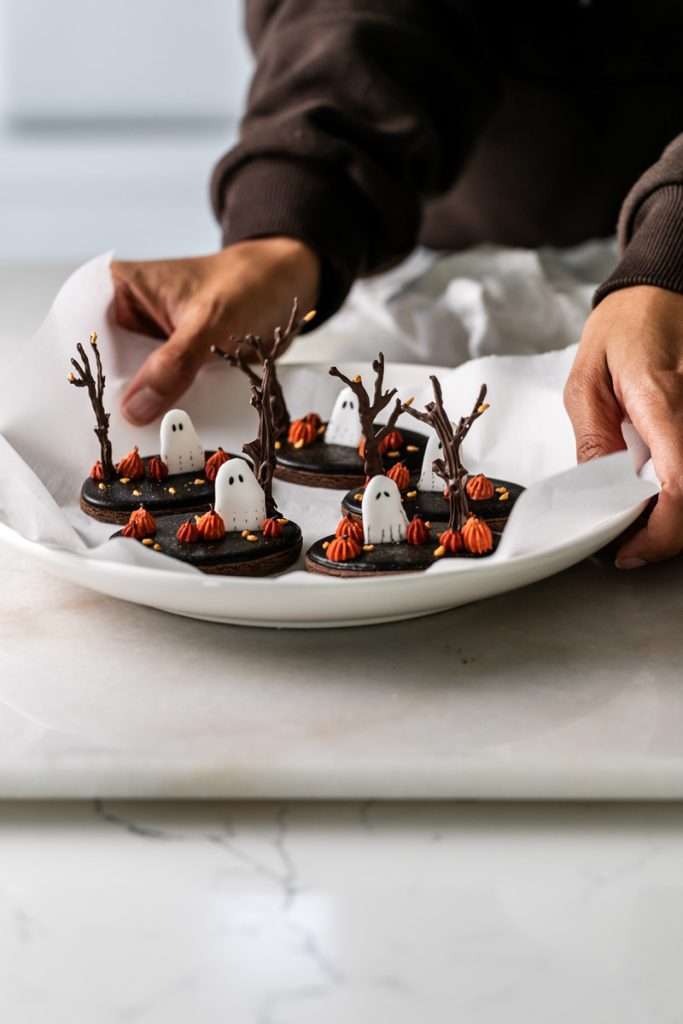
Chocolate sugar cookie inspiration
Halloween is the inspiration behind this specific sugar cookie design, although the chocolate cookie with chocolate royal icing is versatile for any season!
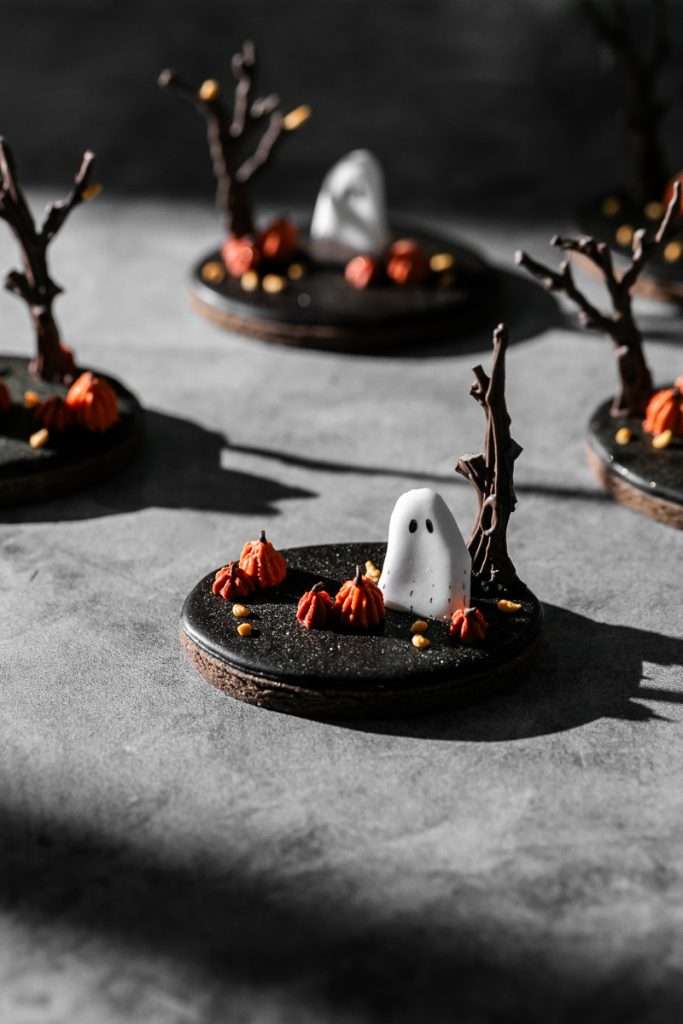
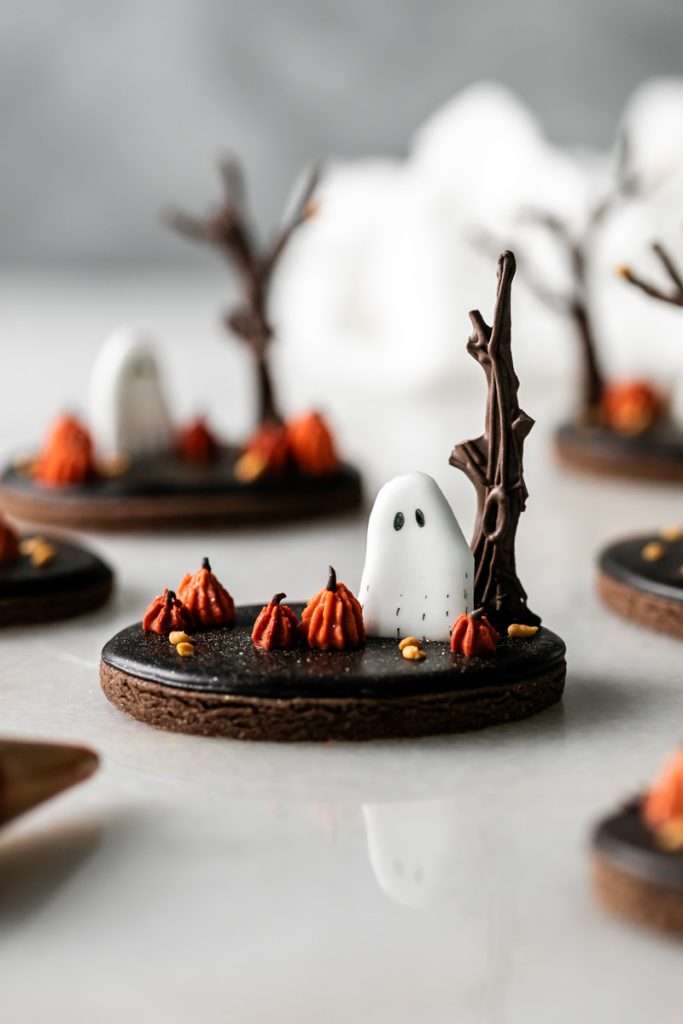
The decorations are a little bit spooky and a little bit cute, inspired by previous 3D/cookie scenes created in the past. The chocolate cookie and chocolate icing act as the perfect canvas for the piped pumpkins, ghost transfers and bare trees, to create little scenes or edible art projects. Although the details are totally optional, they add fun eye catching dimension to the cookies when displayed, making them even more perfect for spooky baking season and festive Halloween parties.
Elevated Cookie Decorations
This Halloween cookie design is part of a series of seasonal cookies decorated. Rather than creating decorations that lay flat on the cookies, the icing transfers stand upright with the assistance of stiff royal icing, for a unique and contemporary cookie design and perspective. From past designs such as pumpkin patch, tulips, snowmen and bunnies, each season offers an opportunity for new cookie decorating possibilities.
Chocolate sugar cookie flavor and secret ingredients
The chocolate sugar cookies are full of chocolate flavor from the Hershey’s cocoa that’s infused into the cookies and royal icing. They’re not too rich or too sweet, thanks to the addition of espresso and kosher salt in the dough.
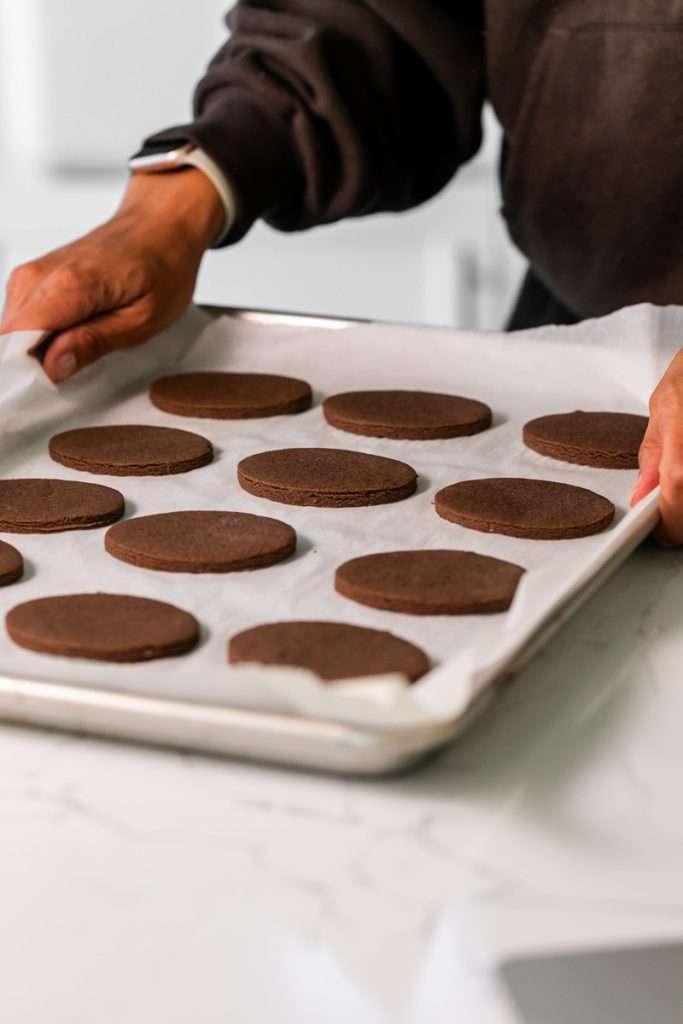
Both ingredients help balance the flavor of the chocolate, resulting in the a delightful sugar cookie for the fall and winter seasons. Top with the chocolate royal icing for an irresistible finish.
Secret Ingredient
In addition to kosher salt and espresso powder, there is black cocoa powder incorporated into the dough for added flavor, and to enhance the chocolate even more. This is an optional step but totally worth the addition if you have black cocoa powder on hand.
Chocolate Royal Icing
This chocolate royal icing is incredibly delicious! The recipe calls for both Hershey’s unsweetened cocoa powder and unsweetened black cocoa powder, and a little bit goes a long way.
Since cocoa powder naturally contains oil and fat, it can interfere with the drying and consistency of royal icing, so we’re adding just a small amount of cocoa to the icing mixture. For flavor and consistency, I recommend adding 2 – 2 1/2 tablespoons of cocoa powder + 1 tsp of black cocoa powder to the royal icing recipe below. The black cocoa powder will deepen the color of the icing while enhancing the richness. And if the color isn’t quite as dark as preferred, incorporate a few drops of brown gel food coloring until the desired icing color is achieved.
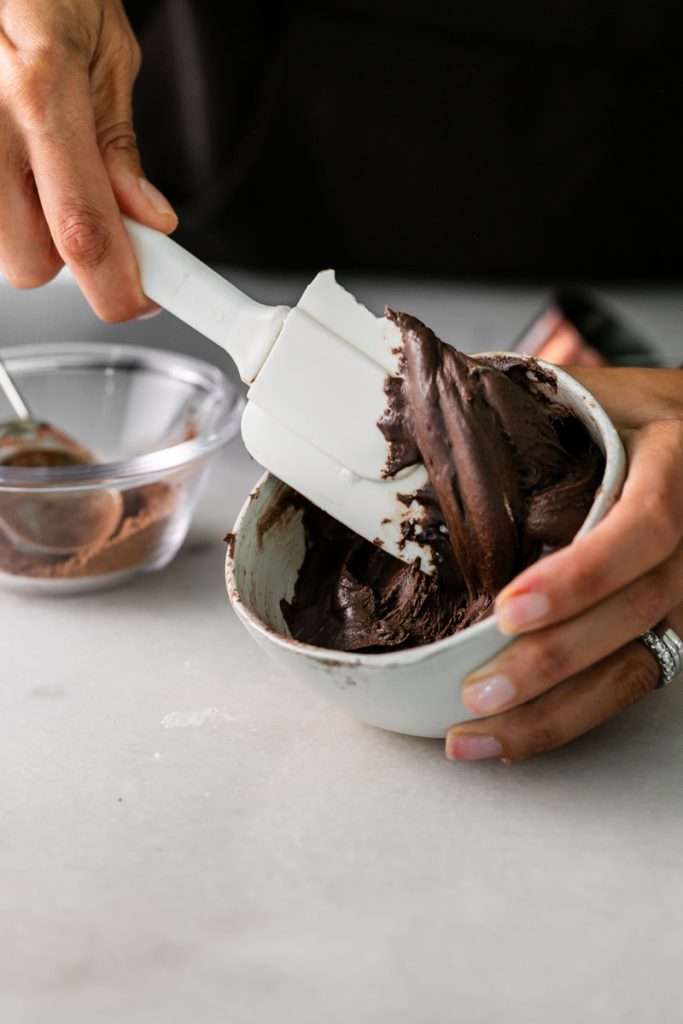
Drying time may increase slightly due to the cocoa powder. I recommend an additional hour for drying the base flood icing and icing transfers, in a well ventilated area.
Ingredients and Supplies
Here’s a list of supplies and ingredients you’ll need to make these chocolate sugar cookies at home.
Chocolate Sugar Cookies
- Butter (plant based or dairy,) granulated sugar, eggs, vanilla, all purpose flour, cocoa powder, black cocoa powder, baking powder, kosher salt, espresso.
Chocolate Royal Icing
- Meringue powder, powdered sugar, water, cocoa powder, black cocoa powder, brown gel food coloring (optional) vanilla.
Supplies
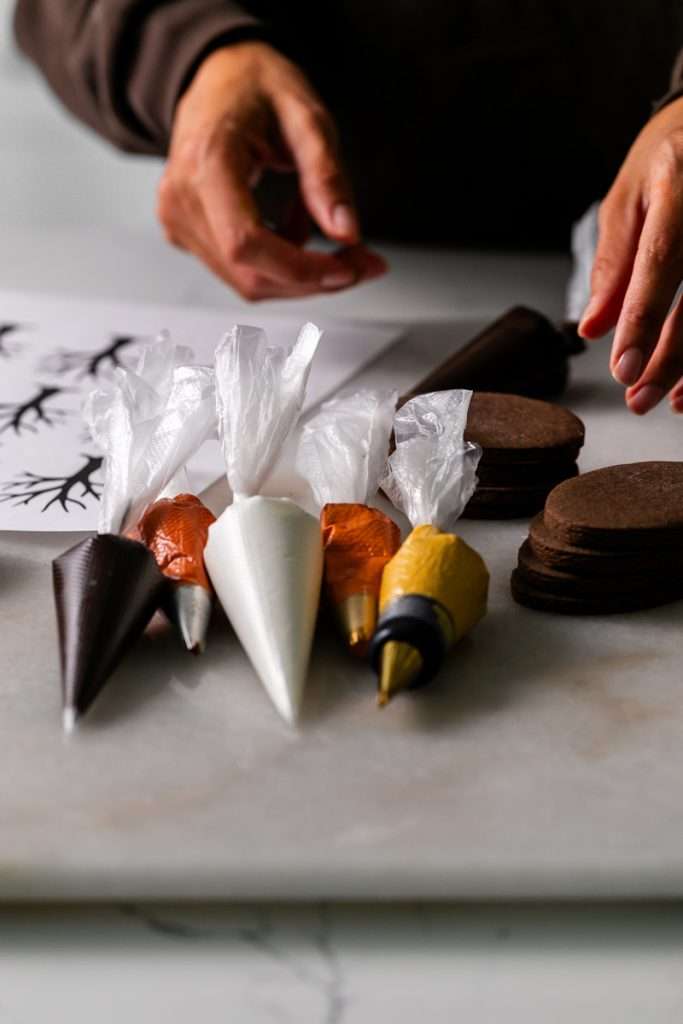
- Tipless piping bags, parchment paper, icing transfer sheets (trees and ghosts), black edible ink pens, Wilton star piping tips 18 & 32, orange brown and yellow gel food coloring. Oval or round cookie cutter.

How to make chocolate sugar cookies
Making these chocolate sugar cookies is as simple as making a batch of classic sugar cookies, with a slight adjustment to the ingredients. The cookies will take about 30 minutes to prep, cut out and bake from start to finish.
In a stand mixer (or with a hand mixer) mix the butter, sugar together until well combined, then stir in the egg and vanilla until combined. Next, mix the flour, cocoa powders, baking powder and salt into the egg and butter mixture, mixing until the bowl is clean and the dough attaches to the paddle.
Once the dough has formed, roll it out to 1/4″ thick onto parchment, cutting the shapes far enough apart that you can peel away the excess dough and transfer the sheet of cut cookies directly to the oven for baking. This will ensure that the cookies maintain their shape.
How to make the base royal icing
To make the base white icing, whisk meringue powder and 1/2 half of the measured water together in a mixing bowl for 2-3 minutes until light and foamy. Next pour in the powdered sugar and vanilla. Switch to a paddle attachment and mix the meringue mixture, and powdered sugar together until thick and a toothpaste-like consistency. This is your base icing. If you plan on decorating the cookies simply with chocolate royal icing, skip over the directions for coloring the base icing and icing transfers and jump directly to the chocolate royal icing below.
Orange Pumpkins
Scoop out a small portion of the icing (roughly 2-3 tbsp) and transfer to a separate bowl, coloring a deep orange (use brown and orange gel coloring) for the piped pumpkins. The icing should still be toothpaste-like or stiff, which you can thin down to piping consistency with a drop or two of water. Once desired orange hue is achieved, divide and transfer the orange icing into two piping bags, fitted with tips 18 and 32. Tie and set aside.
Yellow leaves
Repeat this step for the golden yellow icing, color a small amount of white base icing yellow and brown for golden hue, then transfer to a tip-less piping bag, tie and set aside.
Flood consistency white icing (ghosts)
The flood consistency white icing will be used for the ghost transfers. Scoop about 3 tablespoons of the white icing into a separate bowl and thin with water to flood consistency. Stir between each addition of water, incorporating just a few drops at a time. I prefer the 5 second method or rule when making flood icing. This means when the icing is stirred, it will take about 5 seconds for any lines in the icing to disappear. Once at 5 seconds, transfer white flood icing to a tip-less piping bag fitted and tie and set aside.
How to make the chocolate royal icing
If you’ve skipped over the decorating step, you’ll now add the cocoa powders to the base white icing mixing until combined. Or you’ll add the cocoa powders to the remaining base icing, stirring until combined.
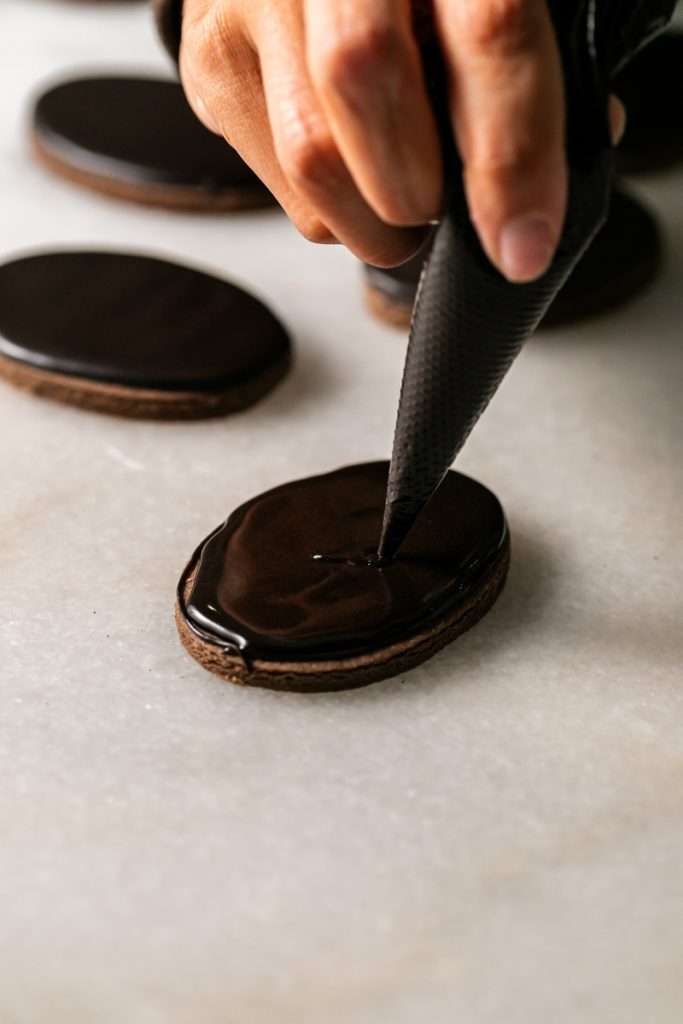
Thin the icing slightly with a few drops of water to create the piping consistency icing for outlining cookies. Transfer a small portion of outline/piping consistency chocolate icing to a piping bag and seal closed.
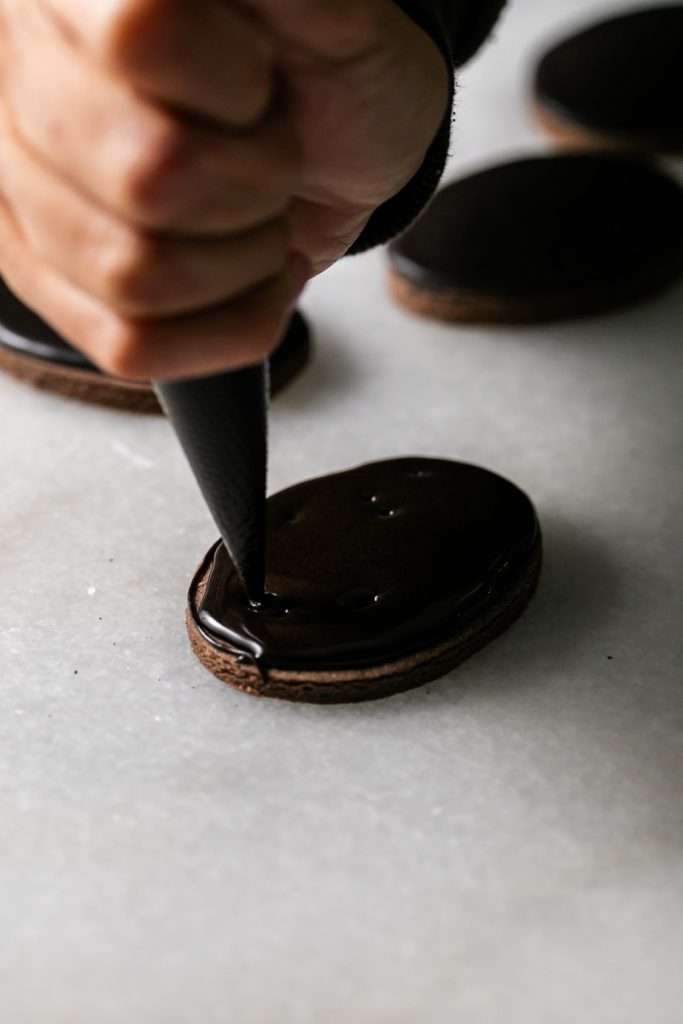
Thin the remaining chocolate icing to flood consistency. Transfer to piping bag and use for piping tree transfers and flooding the cookies.
Ghost and tree icing transfers
Print off tree and ghost transfer sheets and cover with parchment paper. Please see the download below for the tree transfer. You can find a ghost printout to trace via canva or google.
Use the flood consistency white and chocolate icing to trace and pipe the tree and ghost designs. For the tree transfers, pipe with additional icing after the first layer is set, to add dimension.
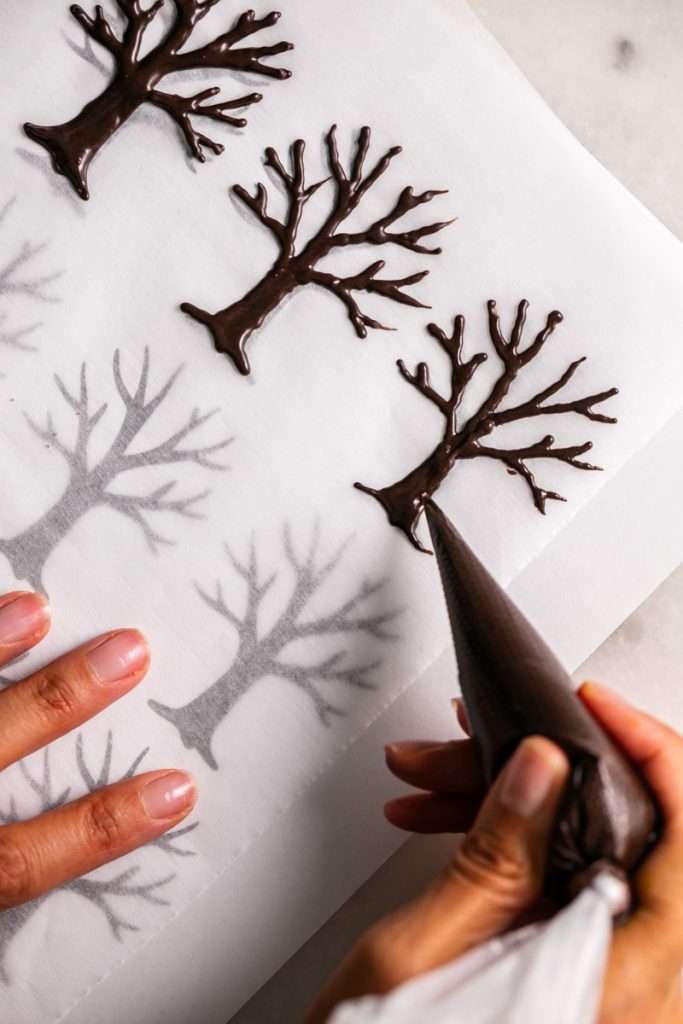
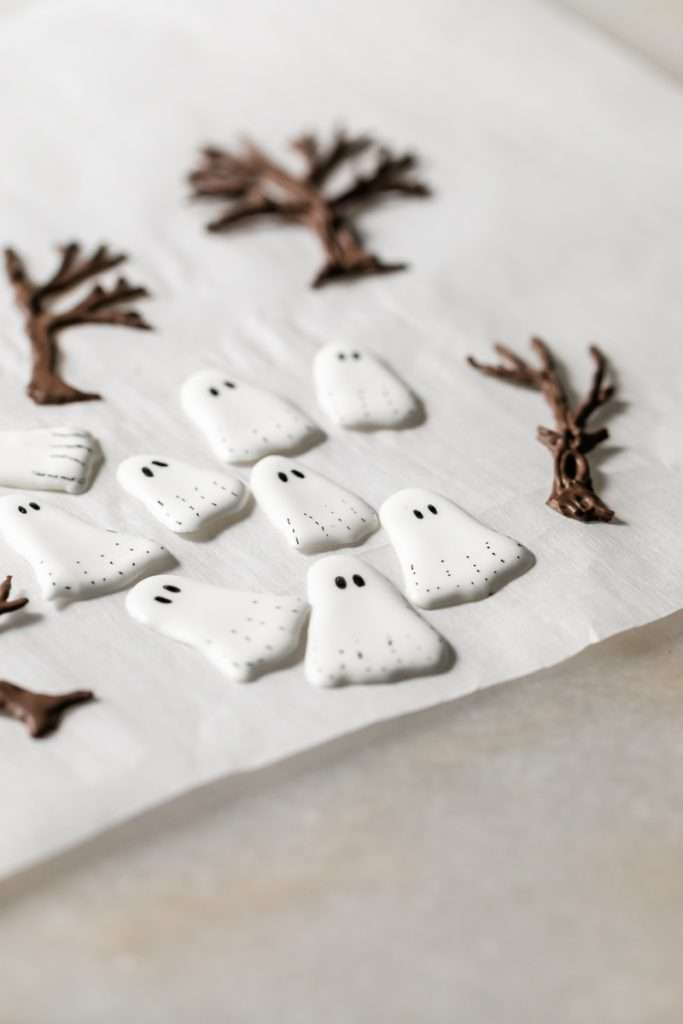
Set aside to dry for 6-12 hours before removing from parchment. Once dry, draw on the ghost’s eyes and line marks with edible black ink.
[ddownload id=”61626″]
Icing transfer substitutions
Due to the height, the tree shaped icing transfers are quite delicate. Although they look great, some of the branches can break off, which could add to the spooky design as seen in the images. However, if you’re looking for a more sturdy ingredient alternative for the icing trees, you can try, fondant or even chocolate.
Decorating the chocolate sugar cookies
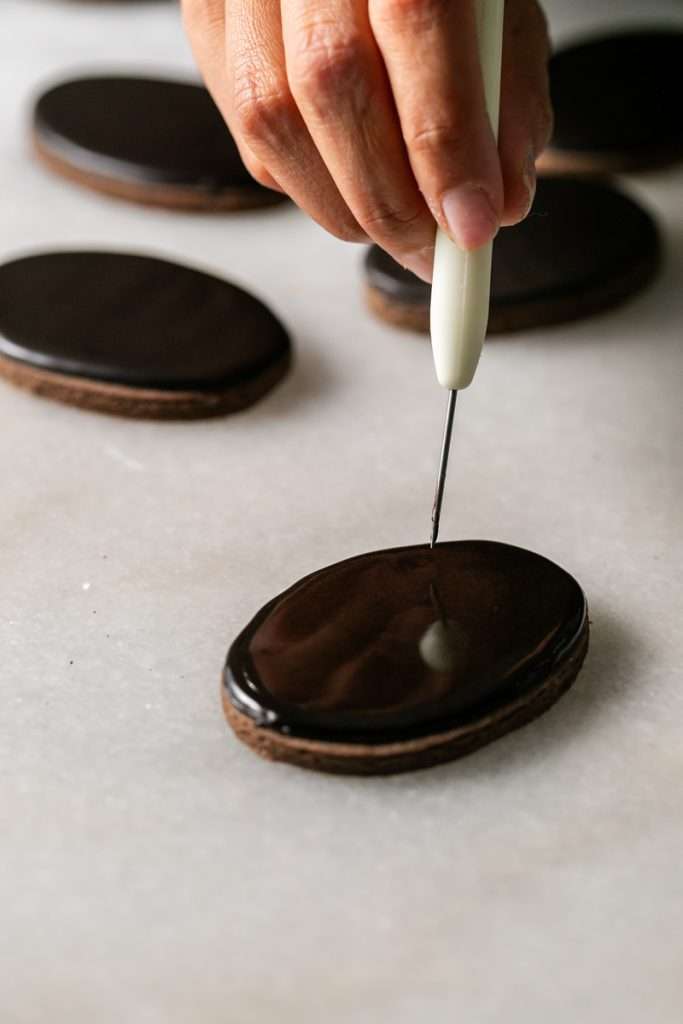
Decorating the chocolate sugar cookies is fairly easy. Start by outlining the edges of each cookie with piping consistency royal icing, then flood each of the cookies with the flood consistency icing. Repeat steps for all cookies and set aside for 4-6 hours to set. They are ready to enjoy once flooded, or view the steps below for decorating.
If using the icing transfers on the flooded cookies, adding the decorations while the cookies are still slightly tacky will help them stay in place better.
Pipe a dollop of piping icing onto the flooded cookie, placing the ghost transfer upright right in front of it.
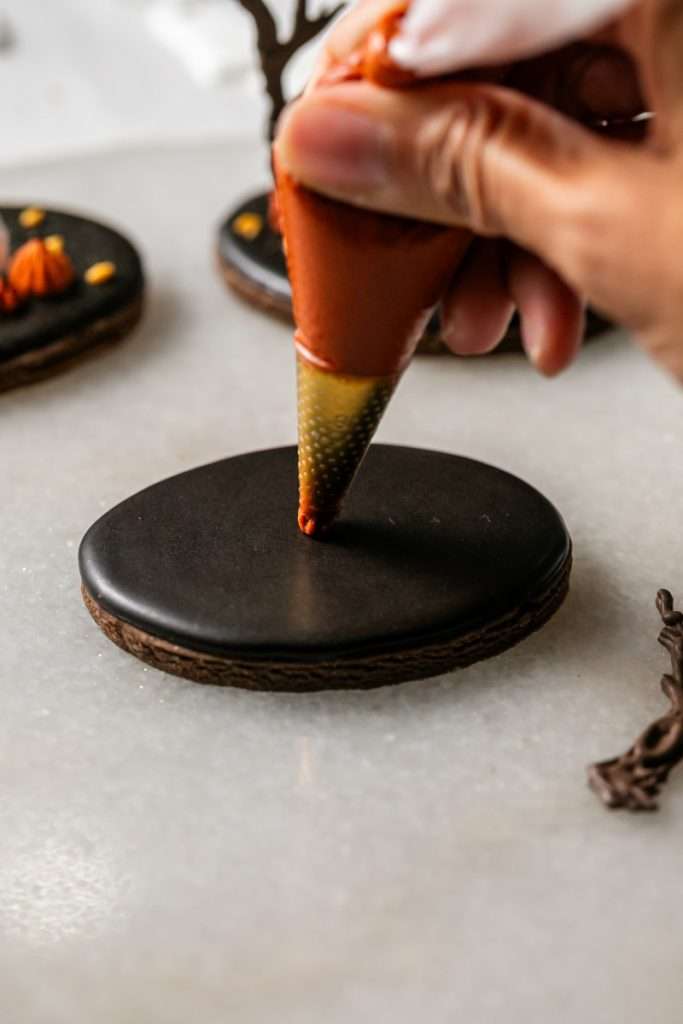
You can push the bottom of the ghost transfer into the tacky icing to ensure that it stays upright.
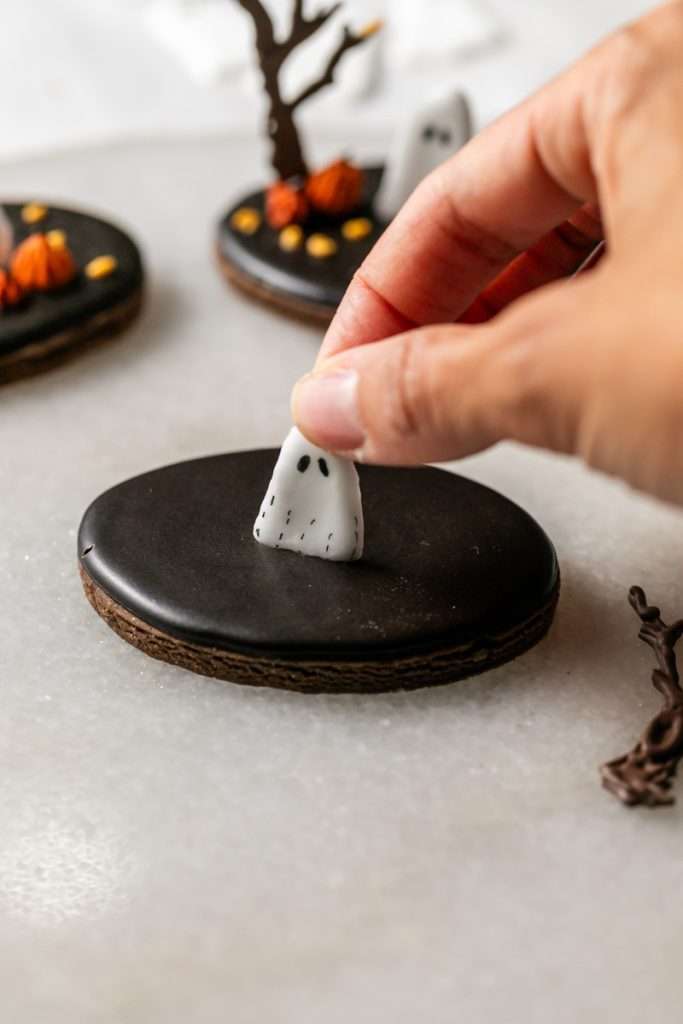
Repeat these steps for the bare tree.
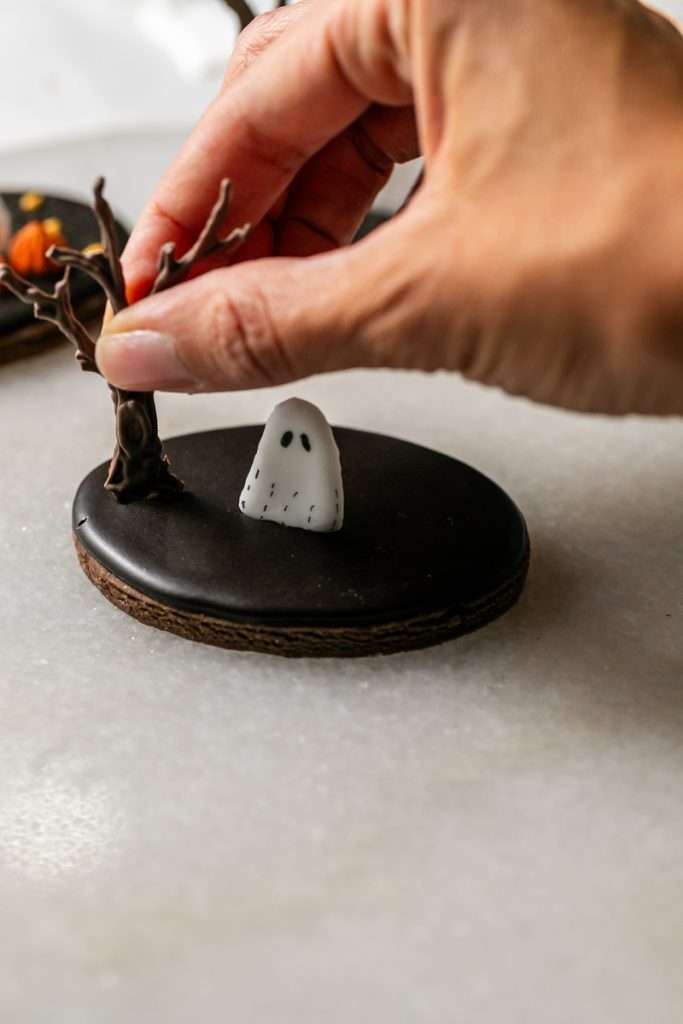
Then pipe orange pumpkins onto the chocolate base, using orange icing fitted with piping tips 18 and 32.
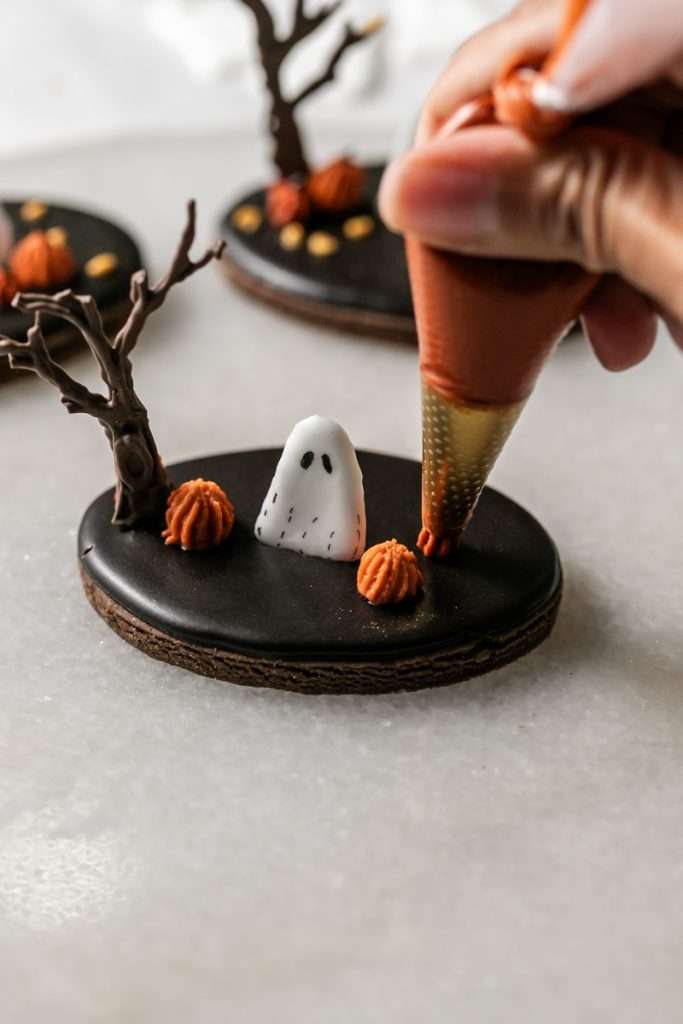
Finish with a few piped golden leaves, stems on the pumpkins and edible glitter.
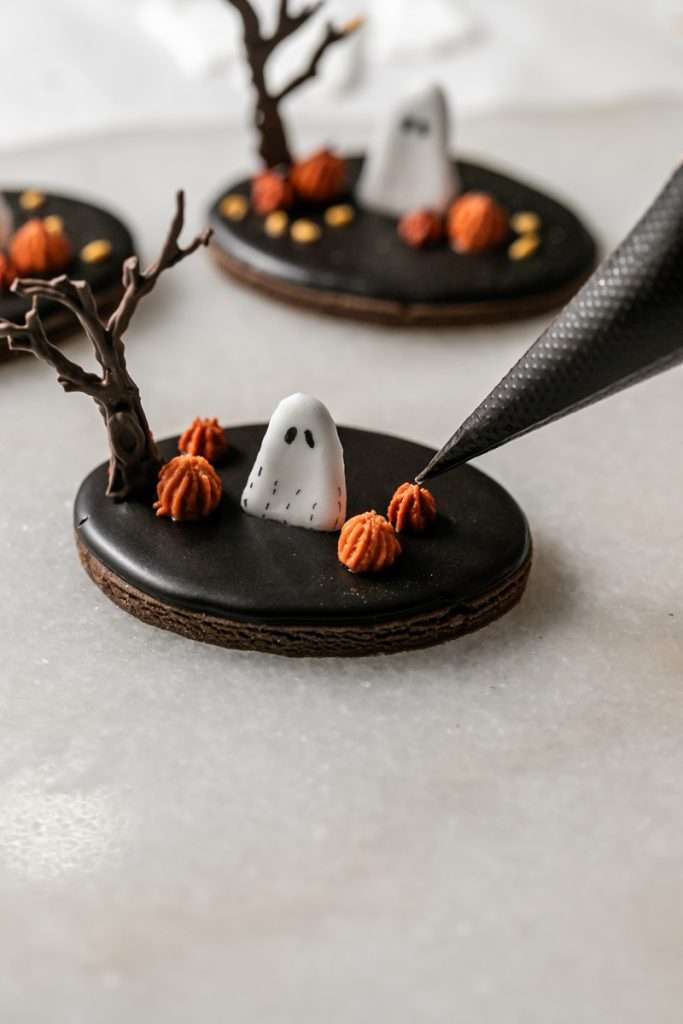
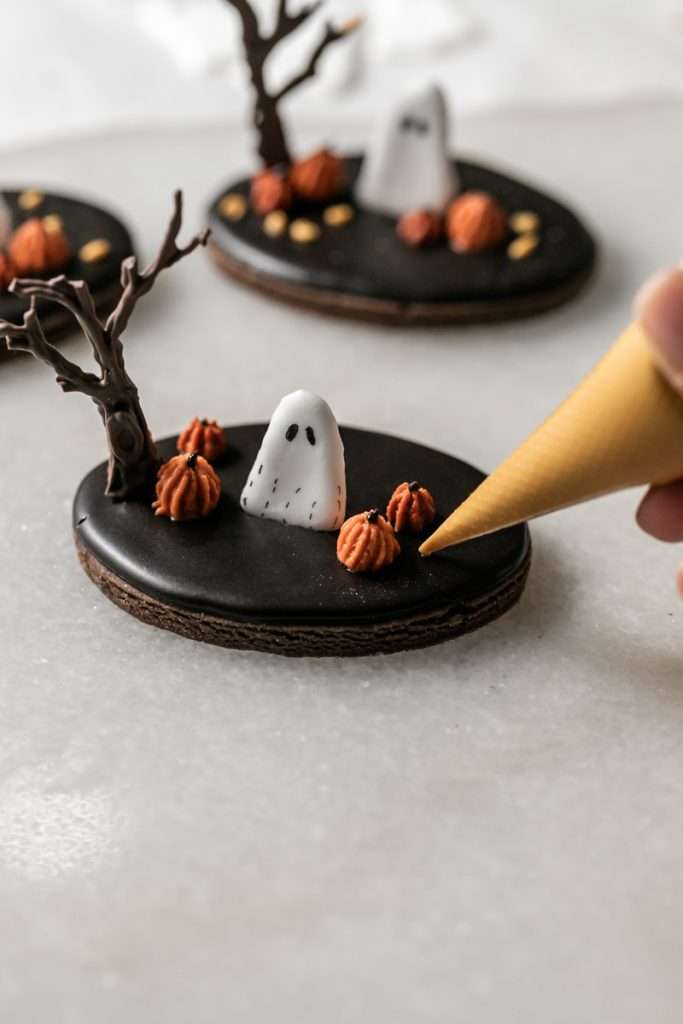
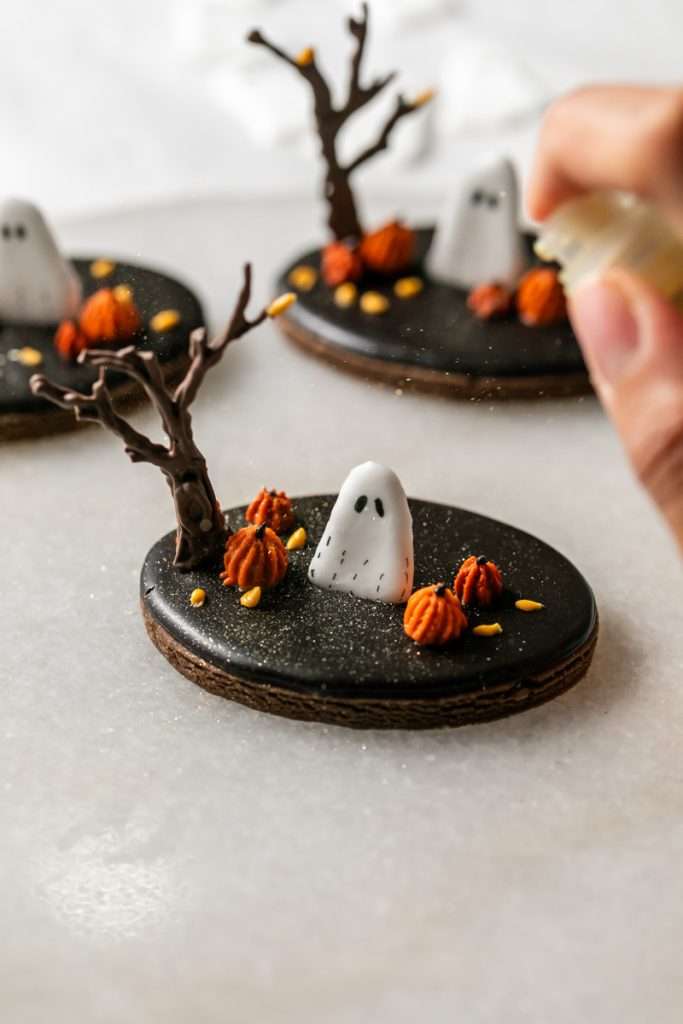
Repeat steps for all decorated cookies and enjoy!
Print
Chocolate Sugar Cookies with Chocolate Royal Icing
- Prep Time: 60
- Cook Time: 15
- Total Time: 1 hour 15 minutes
- Yield: 24+ 1x
- Category: Baking
- Method: Chocolate Sugar Cookies
- Cuisine: Treats
Description
Rich chocolatey cut out sugar cookies, decorated with chocolate royal icing and spooky Halloween themed icing transfers. Perfect for cozy baking season and upcoming Halloween.
Ingredients
- 3/4 cups butter (plant based or dairy)
- 3/4 cups granulated sugar
- 1 egg
- 1 tsp Vanilla
- 2 1/2 cups flour + extra for rolling
- 1/4 cup Hershey’s Unsweetened Cocoa Powder
- 1 tsp black cocoa powder
- 1 tsp baking powder
- 1 tsp salt
- Oval or round cookie cutter
- Parchment paper
- 3 cups confectioners sugar
- 3 tbsp meringue powder
- 1/4 cup warm water
- 1/2 tsp vanilla extract
- 2 1/2 tbsp Hershey's unsweetened cocoa powder
- 1 tsp black cocoa powder
- Orange, brown and yellow gel food coloring
- Tipless piping bags
- Star piping tips: 32 and 18
- Icing transfer sheets + parchment paper
Instructions
Chocolate Sugar Cookies:
- Pour measured flour, cocoa powders, baking powder and salt into a bowl and mix until combined. Set aside.
- In the bowl of a stand mixer, mix butter and sugar together for 2-3 minutes until light and fluffy.
- Use a rubber spatula to scrape down the edges of the bowl.
- Beat the egg and vanilla extract into the butter and sugar until smooth and fully combined.
- Pour dry flour and cocoa mixture into the butter, egg and sugar on mixing medium.
- Mix until the cookie dough forms and attaches to the paddle, leaving the mixing bowl clean.
- The mixing bowl should be mostly clean when the dough is ready to roll out.
- No chilling required.
- Preheat oven to 400 degrees.
- Lightly flour a rolling pin and a sheet of parchment paper.
- Roll out the sugar cookie dough to about 1/4 ” thick on parchment.
- Cut the dough into oval or circle shapes using a cookie or biscuit cutter, a glass will also work.
- Leave about 1″ between each cut cookie.
- Remove the excess dough surrounding each cut shape, then transfer the cookies directly to a baking sheet and place in the oven.
- Bake in the middle rack for just under 5 minutes for a softer texture.
- Remove from oven and cool completely before decorating with royal icing.
- Repeat steps for remaining dough.
- Cookies are over-baked with the edges or bottoms are brown.
Base Royal Icing:
- Combine half the water and meringue powder in the bowl of an electric or stand mixer.
- Whisk on medium high for 2-3 minutes until the mixture becomes foamy.
- Then switch to a paddle attachment and pour in the powdered sugar. Mix on medium for another 2-3 minutes until the icing is thick like toothpaste. Add additional warm water a few drops at a time until the icing is a thick piping consistency and still holds its form.
- Mix in vanilla.
- This is your base icing. If you plan on decorating the cookies simply with chocolate royal icing, skip over the directions for coloring the base icing and icing transfers and jump directly to the chocolate royal icing.
Orange Pumpkin Icing:
- Scoop out a small portion of the icing (roughly 2-3 tbsp) and transfer to a separate bowl.
- Color the white icing a deep orange (use brown and orange gel coloring) for the piped pumpkins.
- Once desired orange hue is achieved, divide and transfer the orange icing into two piping bags, one fitted with tip 18 and the other 32. Tie and set aside.
Golden Leaves
- Repeat this step for the golden yellow icing. Scoop a small portion of the base icing into a bowl and color with yellow and brown gel coloring to create golden yellow colored icing. This is for the piped leaves.
- Transfer to a tip-less piping bag.
Flood Consistency Icing for Ghost Transfers:
- Scoop about 3 tablespoons of the white icing into another bowl and thin with drops of water to flood consistency. Be careful not to add too much water at once. You can use a dropper or spray bottle.
- Stir between each addition of water, incorporating just a few drops at a time. I prefer the 5 second method or rule when making flood icing. This means when the icing is stirred, it will take about 5 seconds for any lines in the icing to disappear.
- Once the icing smooths at 5 seconds, transfer to a tip-less piping bag and seal closed.
Chocolate Royal Icing:
- Add the cocoa powders to the remaining base white icing and store until combined.
- Thin the icing slightly with a few drops of water to create the piping consistency icing for outlining cookies.
- Transfer a small portion of outline/piping consistency chocolate icing to a tip-less piping bag and seal closed.
- Thin the remaining chocolate icing to 5 second flood consistency using a few drops of water at a time and stirring in-between.
- Transfer to piping bag and use for piping tree transfers and for flooding the cookies.
Ghost and tree icing transfers (3D Details):
- Print off tree and ghost transfer sheets and cover with parchment paper.
- Use the flood consistency white and chocolate icing to trace and pipe the tree and ghost designs.
- For the tree transfers, pipe an additional layer icing after set for dimension.
- Set aside to dry for 6-12 hours before removing from parchment.
- Once dry, draw on the ghost’s eyes with edible black ink.
Decorations:
- Start by outlining the edges of each cookie with piping consistency chocolate royal icing.
- Then flood each of the cookies with the flood consistency icing, using a scribe or toothpick to drag the icing into any open spaces on the cookies.
- Repeat steps for all cookies and set aside for 4-6 hours to set.
- They are ready to enjoy once flooded, or view the steps below for 3D decorating.
Spooky Halloween Cookie Decorations:
- Pipe a dollop of orange piping icing onto the flooded cookie, placing the ghost transfer upright right in front of it.
- You can push the bottom of the ghost transfer into the flooded cookie while it’s still tacky to ensure that it stays upright.
- Repeat these steps for the bare tree.
- Then pipe orange pumpkins onto the cookie in the placement you choose. Use both sized piping tips for variation in pumpkin size and shape.
- Finish decorating the cookies with a few piped golden leaves arranged around the base of the cookie.
- Don’t forget to add stems on the pumpkins with the piping consistency chocolate icing.
- Dust with edible glitter.
- Repeat steps for all cookies decorated cookies placing the decorations in varied places and so each cookie is unique.
- Allow 1 hour to set. Serve, package, or freeze and store for up to 3 months.
Notes
Store the cookies in an airtight container, tall enough to fit the 3D branches. They will keep in the freezer for 3-6 months.
The halloween chocolate cookies are party perfect and could be easily set up for kids or party guests to decorate themselves. Or package them individually for halloween party favors. The cookies will also look adorably delicious on spooky dessert and treat tables!
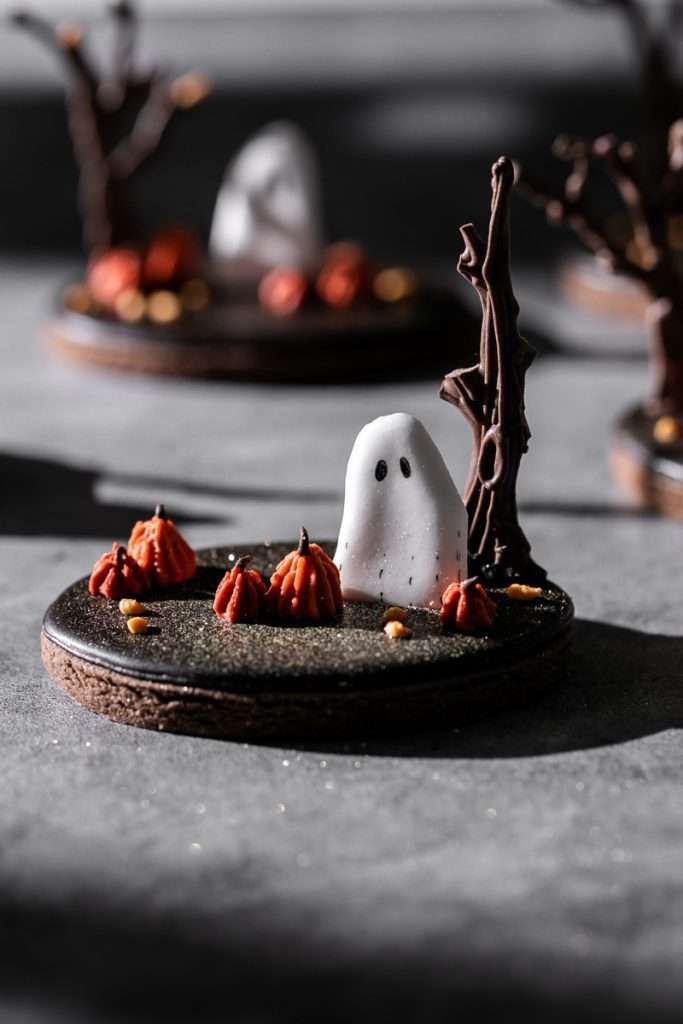
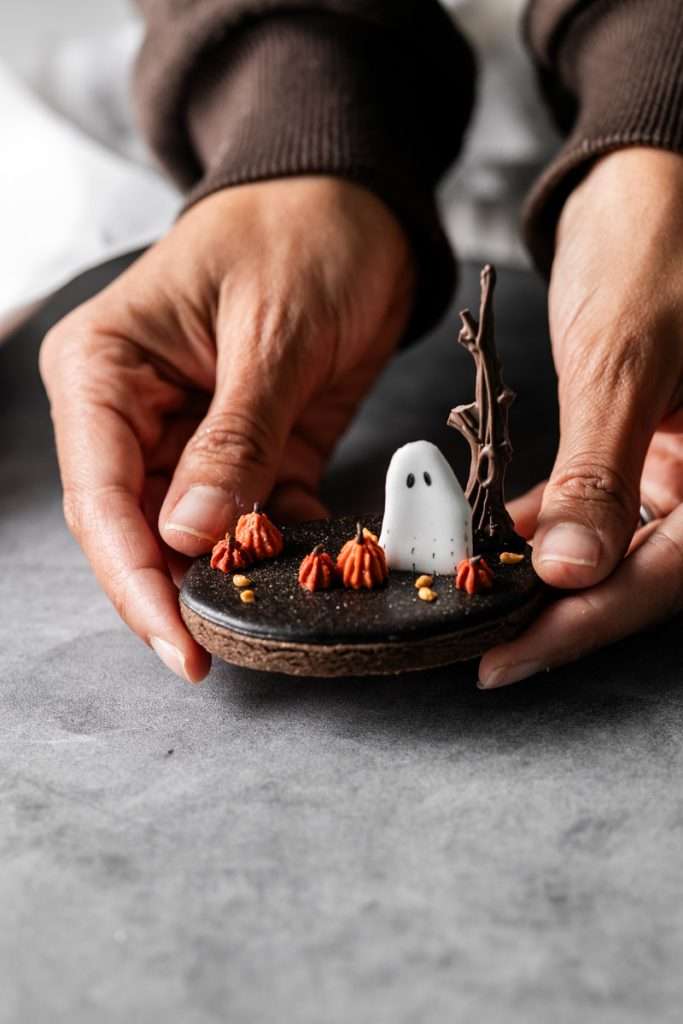
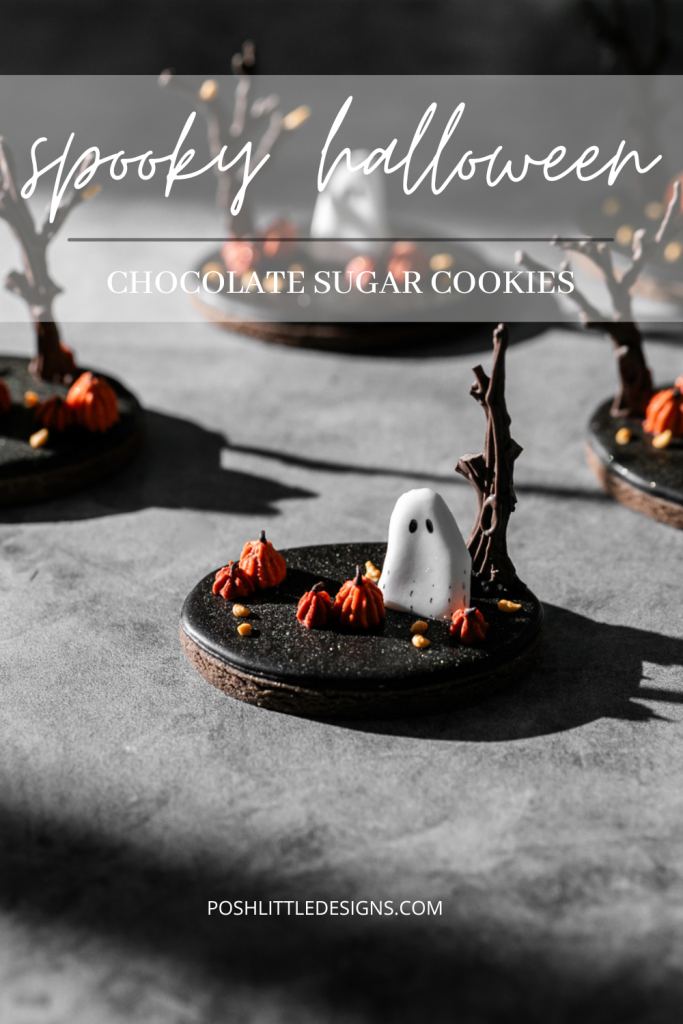
If you enjoyed today’s recipe be sure to pin and share! Also, visit the link to my Amazon shop where you can purchase the supplies to make these cute cookies at home!
Lastly, if you are inspired to make a batch of 3D seasonal cookies, tag me on social media @poshlittledesigns so I can see your amazing creations.

This post titled Chocolate Sugar Cookies with Chocolate Royal Icing and 3D Halloween Details was seen first on Posh Little Designs. All rights reserved 2025.